
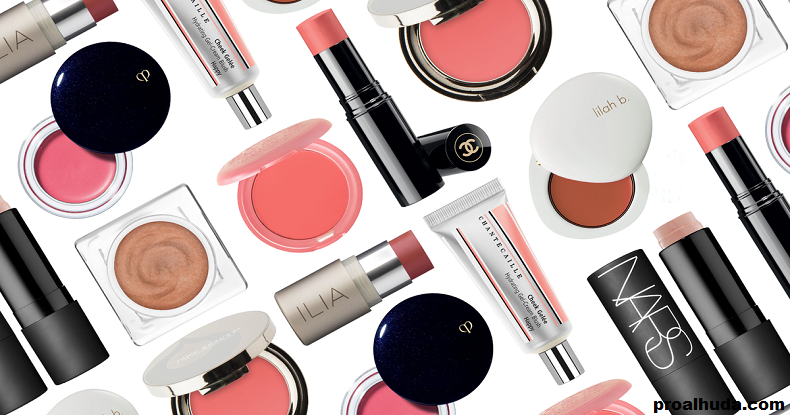
Everyone adores blush, darlings, so here’s how you apply it: For years, I’ve used cream blush to give my cheeks a lovely, rosy hue. Because they blend seamlessly into the skin and produce a radiant, natural-looking finish that exquisitely accentuates the look of your complexion, cream blush solutions are simple to use. Find out below how to use cream blush to achieve a mystical, blushing makeup look:
Step 1: Prepare Your Skin First
Darlings, always perform your magic skincare routine before applying makeup! Nothing compares to the smoothing effect and lit-from-within shine that Charlotte’s Magic Cream offers the skin! As I often say, a wonderful painting needs a beautiful canvas! To make celebrities and stars seem radiant and full of life after their hectic schedules have left their skin looking dull and exhausted, I developed my instant-turnaround moisturizer. My beloveds, Magic Cream is Magic Skin, therefore use this award-winning cream with my renowned Tilbury Tap to prime and illuminate the appearance of your skin before applying your cream blush!

Step 2: Use Liquid Highlighter, Foundation, Concealer, Cream Bronzer, And Foundation.
Apply your preferred foundation, concealer, and cream/liquid products after your skin has been miraculously moisturized to achieve a beautiful, sculpted makeup look. To avoid any problems like lifting or texture, it is advisable to apply cream blush before your powder products because it is highly moisturizing. After applying products intended to enhance and sculpt the appearance of your face, your cream blush will mix in flawlessly with the rest of your liquids and creams and revive the appearance of your complexion.
Step 3: Finish Your Lip And Eye Makeup
I prefer to use cream blush after applying the ideal lipstick shade and a mesmerizing eyeshadow appearance. You can choose the most flattering shade of cream blush for your look and determine how bold your blush should be by applying your eye and lip makeup first. For example, if you’ve chosen a dramatic lip, the hues you choose will help you decide how bold your blush needs to be. If your makeup is more modest, you may want to wear a brighter blush hue to make your cheeks pop; otherwise, you may want to use a more neutral blush color.
Step 4: Between Your Fingers And A Brush, Select Your Application Tool.
Cream blush can be applied with a brush or fingers, and both techniques will leave the cheeks with a lovely, flushing appearance. It works best to warm up blush by circling it around in the pan with your index finger before tapping it straight onto your cheeks and blending it out with blotting movements. As an alternative, I suggest using my Bronzer & Blusher Brush to apply cream blush if you like. The domed shape of the incredibly soft bristles makes them easy to sweep across the apples of the cheeks and will aid in the flawless blending of your cream blush.
STEP 5: Apply Cream Blush To The Apples Of The Cheeks In Step Five.
It’s time to apply your cream blush now that you’ve decided on your application technique! Apply your ideal cream blush color immediately to the apples of your cheekbones with a brush or your finger. The roundest region of your cheek is the ideal location for cream blush, which shouldn’t be worn too close to the nose. Cream blush formulas may be built up, so start by dabbing on a little quantity and progressively add more to achieve the desired color result.
Imagine a vertical line running through the middle of your eye; this is where your cream blush should end and your concealer should start, according to a Tilbury beauty tip.
Step 6: For A Flattering Lift Effect, Blend Out In Upward Circles
Use gentle, circular patting movements to blend out your cream blush to help soften any pronounced lines. Blending your cream blush upwards and outwards toward the ears will assist the apples of your cheeks to appear higher and will subtly shape the appearance of your cheekbones. This will give the face a beautiful lift impression.
Tilbury Reapplying more cream blush after blending it in can increase the color and give you a bolder-looking blush finish.
Step 7: Apply Cream Blush To Your Nose
Apply a small amount of your preferred cream blush to your nose to give it the same attractive glow as your cheeks. When cream blush is applied to the bridge of the nose, a sweet, sun-blushed effect is produced that resembles the healthy-appearing glow of a day spent in the sun. To apply, dab cream blush with your fingers or a brush onto the middle of the nose, then delicately blend out the edges to give your face a wonderful summer flush.
Faqs About HOW TO Apply Cream Blush
Do You Use A Brush Or Your Fingers To Apply Cream Blush?
You can use a brush or your fingers to apply crème blush. Both methods of application have advantages:
Why You Should Use Your Fingers To Apply Cream Blush
When applying cream blush with your fingertips, you may melt the product into your skin for a flawless blend because the formulas are more emollient than powder blush. Nature’s tools, your fingertips, naturally emit heat that aids in warming the cream composition. Your cream blush will glide easily across your face if you warm it up with your finger because the formula becomes slick. You might not even need a mirror when using your fingers to apply cream blush because it dries so quickly. To achieve a simple, fuss-free glow, simply keep your favorite cream blush in your bag and dab some onto your lips and cheeks with a finger.
Why Use A Brush To Apply Cream Blush
You can apply your cream brush with more accuracy if you use a makeup brush. Domed blush brushes create specifically to embrace the apples of the cheeks and enable you to apply cream blush in smooth, sweeping sweeps. It will also be less untidy to use a brush like my Bronzer & Blusher Brush than your fingers to apply cream blush. Because the brush’s ultra-soft bristles will gather up the product and apply it precisely to your face without getting any on your hands, fingers, or nails.